How to Install a Gravel Driveway Correctly:
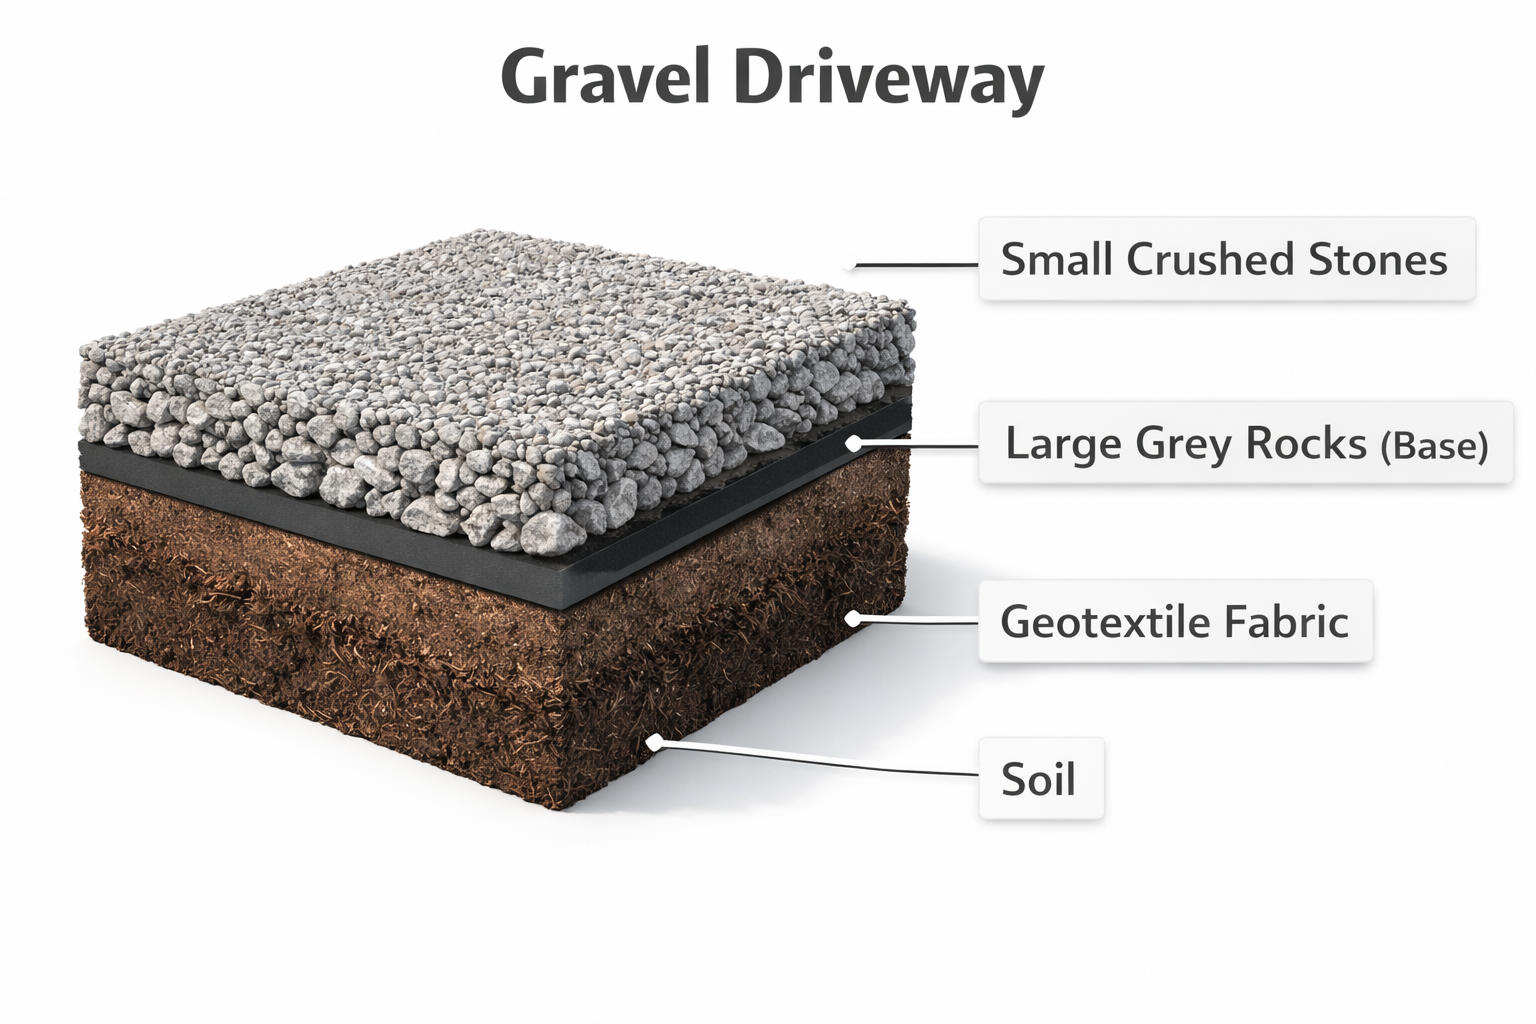
The 3-Layer “No-Mud” System
Most DIY driveways fail in 6 months. Learn the civil engineering standard for drainage, Geotextile fabric, and rock layering to build a road that lasts 20 years.
If you just dump gravel on top of grass, you are not building a driveway; you are making a future mud pit. The number one enemy of any paved surface—whether it’s expensive asphalt or budget-friendly stone—is water retention.
In this comprehensive guide, we will skip the “quick fixes” and teach you the civil engineering method used for highways, adapted for your home. This involves a specific 3-layer system that ensures drainage. (Note: For pricing per ton, please refer to our 2026 Gravel Cost Guide).
✓ Required Equipment & Materials
Heavy Machinery (Rentals)
- • Skid Steer / Bobcat: Essential for excavation (~$350/day).
- • Vibratory Roller: For compacting the base (~$250/day).
- • Laser Level / String Line: For measuring slope.
The Material List
- • Base Rock: #3 or #4 Crushed Stone (Baseball size).
- • Surface Rock: #57 or Crush-and-Run.
- • Geotextile Fabric: Woven (Heavy Duty). Do not use weed barrier!
The “Box Out”: Excavation & Crown
You must remove all organic matter (grass, roots, topsoil). Organic matter acts like a sponge, holding water that will freeze and heave your driveway in winter.
The “Crown” Technique
Dig your trench so that the center is 2 inches higher than the sides. This invisible slope ensures water runs off into the grass, not into your gravel foundation.
Depth Rule: Dig down 8-12 inches depending on your soil softness. If you hit clay, you can stop at 8 inches.
Install Geotextile Fabric (Separation)
This is where 90% of homeowners fail. They pour expensive rock directly on dirt. Over time, heavy rain turns the dirt to mud, and your rock sinks into it (like marbles in pudding).
The Solution: Lay down Woven Geotextile Stabilization Fabric. It acts as a bridge, distributing the weight of your car and preventing the rock from mixing with the soil.
- Overlap seams by at least 12 inches.
- Pin it down with landscape staples.
- Cost: ~$0.15 per sq. ft (Cheap insurance for your driveway).
The Structural Spine (#3 Stone)
Now, you need strength. Pour a 4-inch layer of #3 or #4 Crushed Stone. These are large, fist-sized rocks.
Unlike smooth river rock, crushed stone has jagged edges that lock together. Once spread, drive over it with your Bobcat or use a roller. This creates a skeleton that supports the weight of delivery trucks and SUVs.
The Drivable Surface (#57 or ABC)
Finally, add 3-4 inches of your top layer. The most popular choice is #57 Stone (golf-ball size) because it drains well.
Alternatively, use “Crush and Run” (ABC) if you want a harder, smoother surface, though it can get muddy if not sloped correctly.
Final Compaction: Wet the stones slightly with a hose and run the vibratory roller over the entire driveway. This locks the final surface in place.
📖 Continue Your Research
Calculate Material Tonnage
Don’t guess. You need to order separate loads for your Base Layer (#3) and Top Layer (#57). Use our calculator to get the exact tonnage for both.
Open Free Calculator